Teachers with individual accounts through their School or Homeschool Plan can modify or update their class compositions and student accounts in their Dashboard.
NOTE: This article is for teachers with individual accounts as part of a School or Homeschool subscription. If you have a Teacher Plan, dashboard features will not be available. For more information, see Teacher Plans.
IN THIS ARTICLE
What You'll Need
Viewing Classes
Changing the Name of a Class
Changing the Grade Level of a Class
Viewing Students and Student Dashboards
Editing Student Usernames and Passwords
Adding Students to Classes
Updating Rostered Classes On Demand
Removing Students from Classes
Frequently Asked Questions
What You'll Need
Viewing Classes
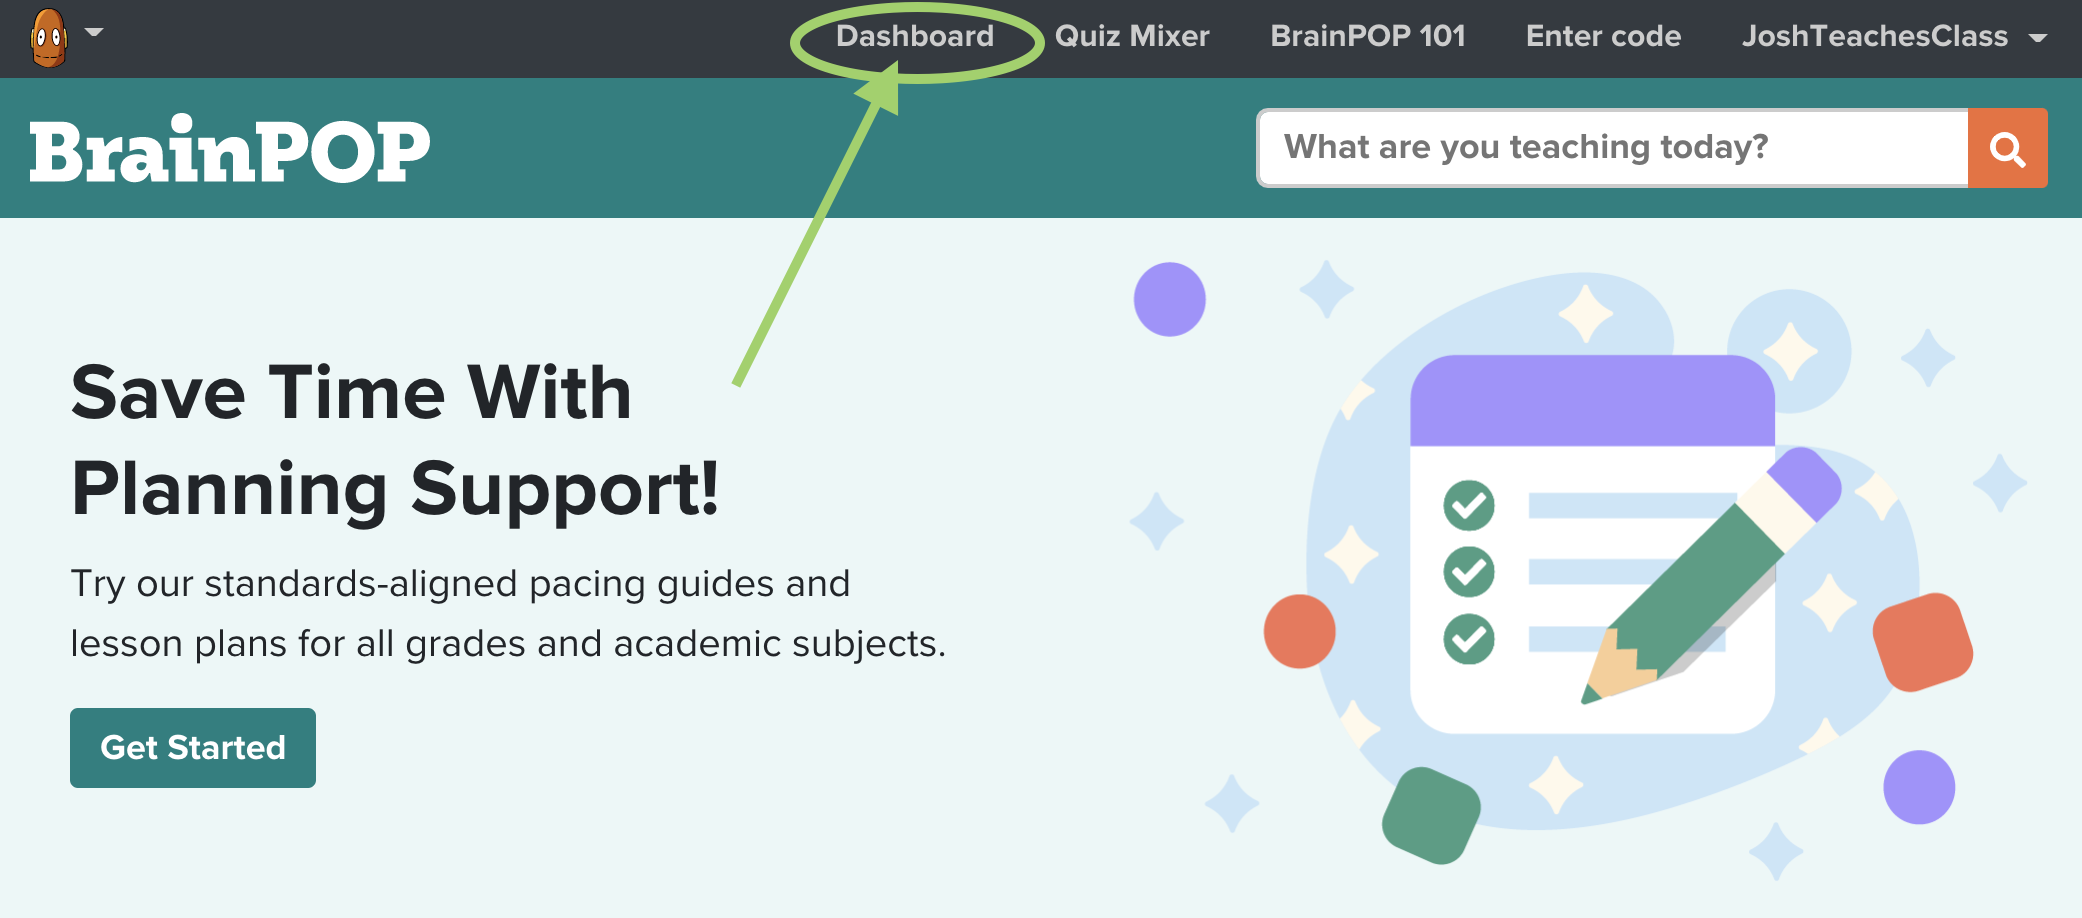
You can find your classes in the Teacher Dashboard.
- In the menu bar at the top of the page, click Dashboard.
- A preview of your classes will be visible in the Classes section.
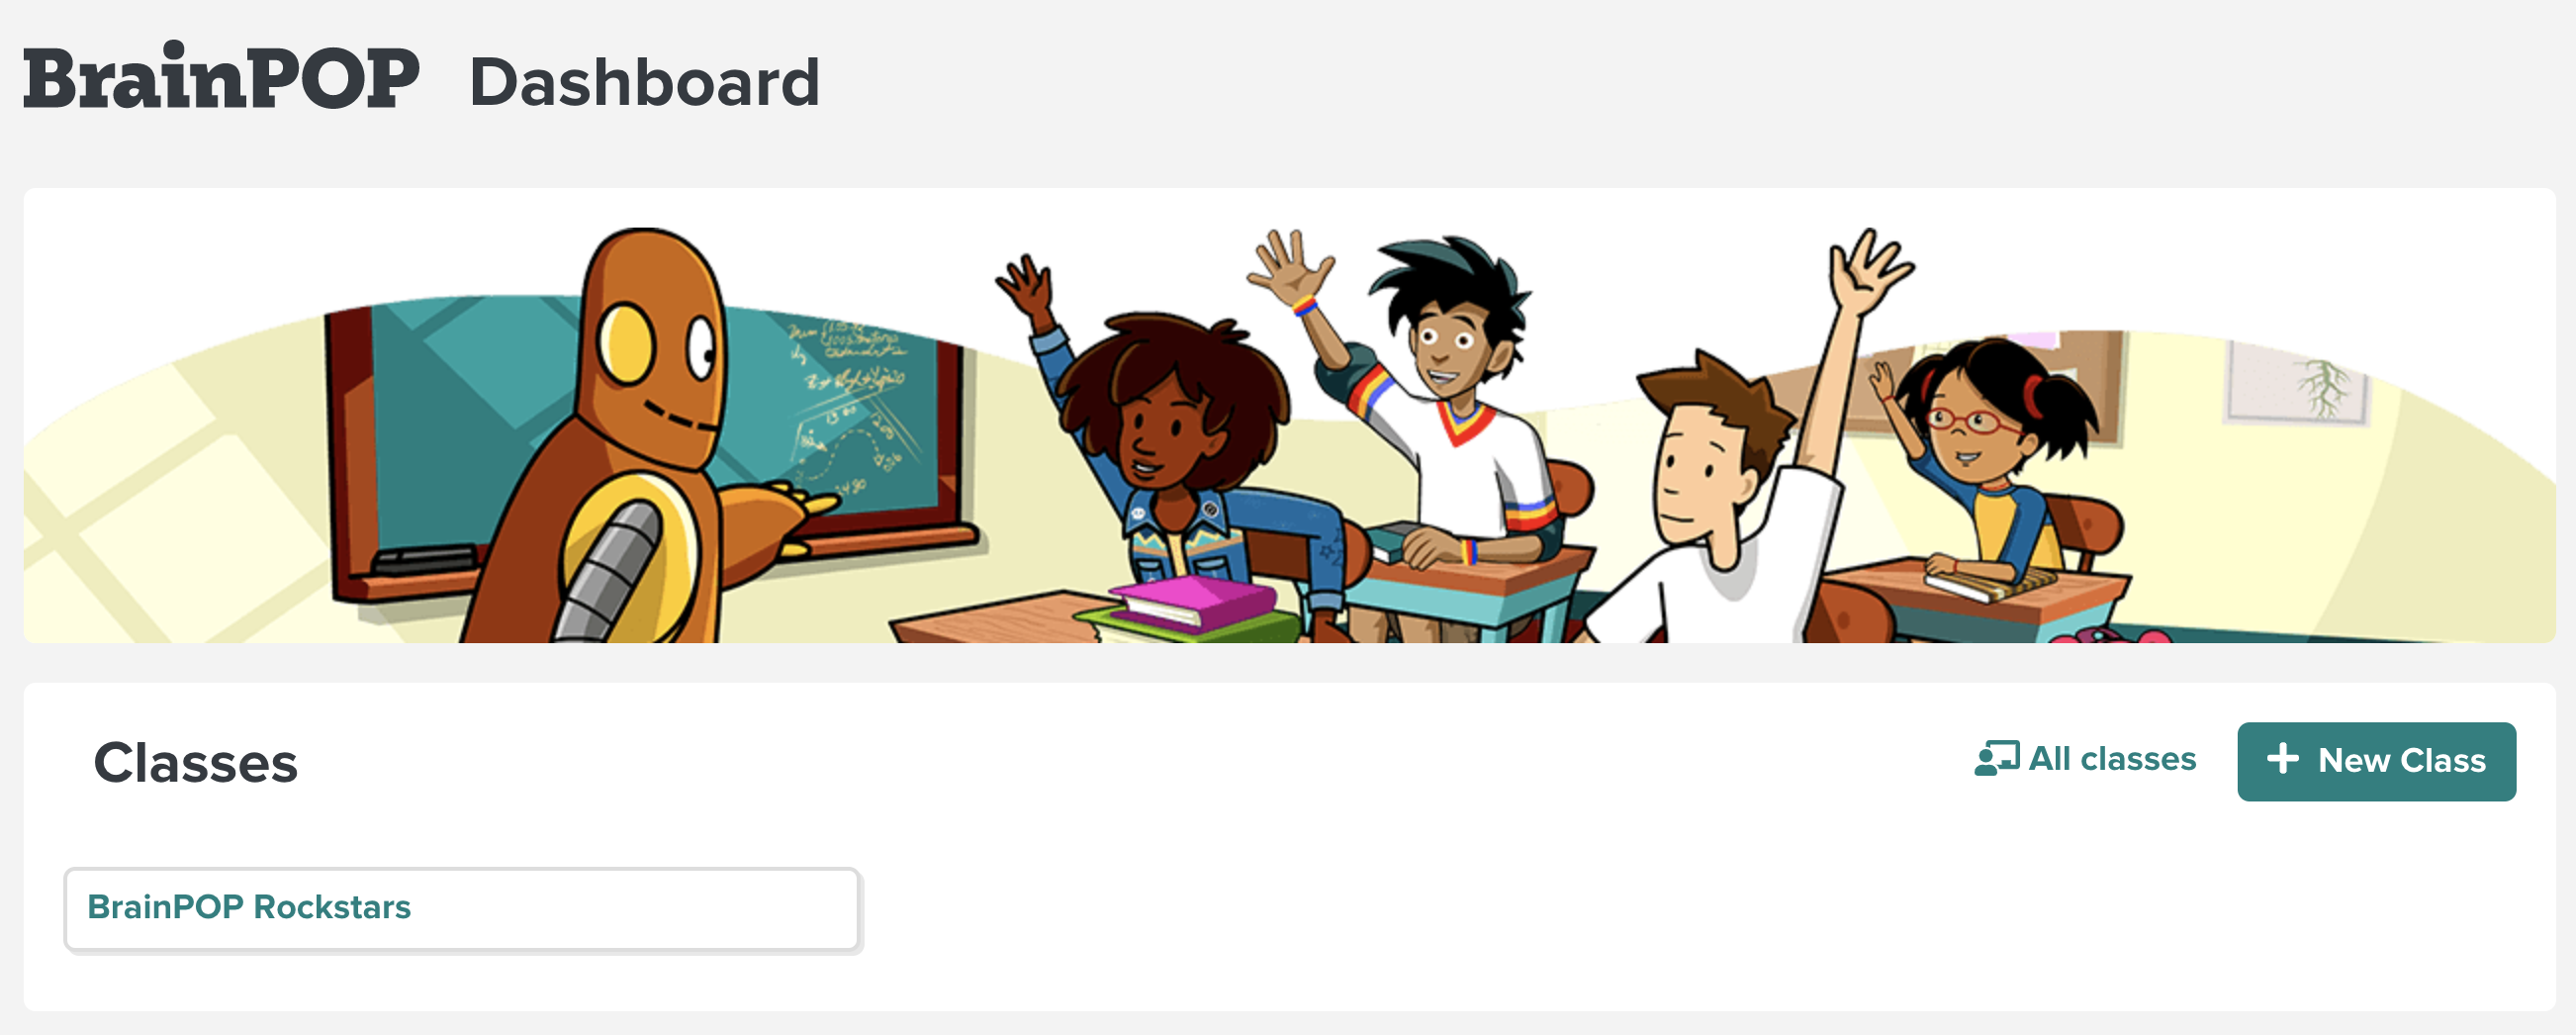
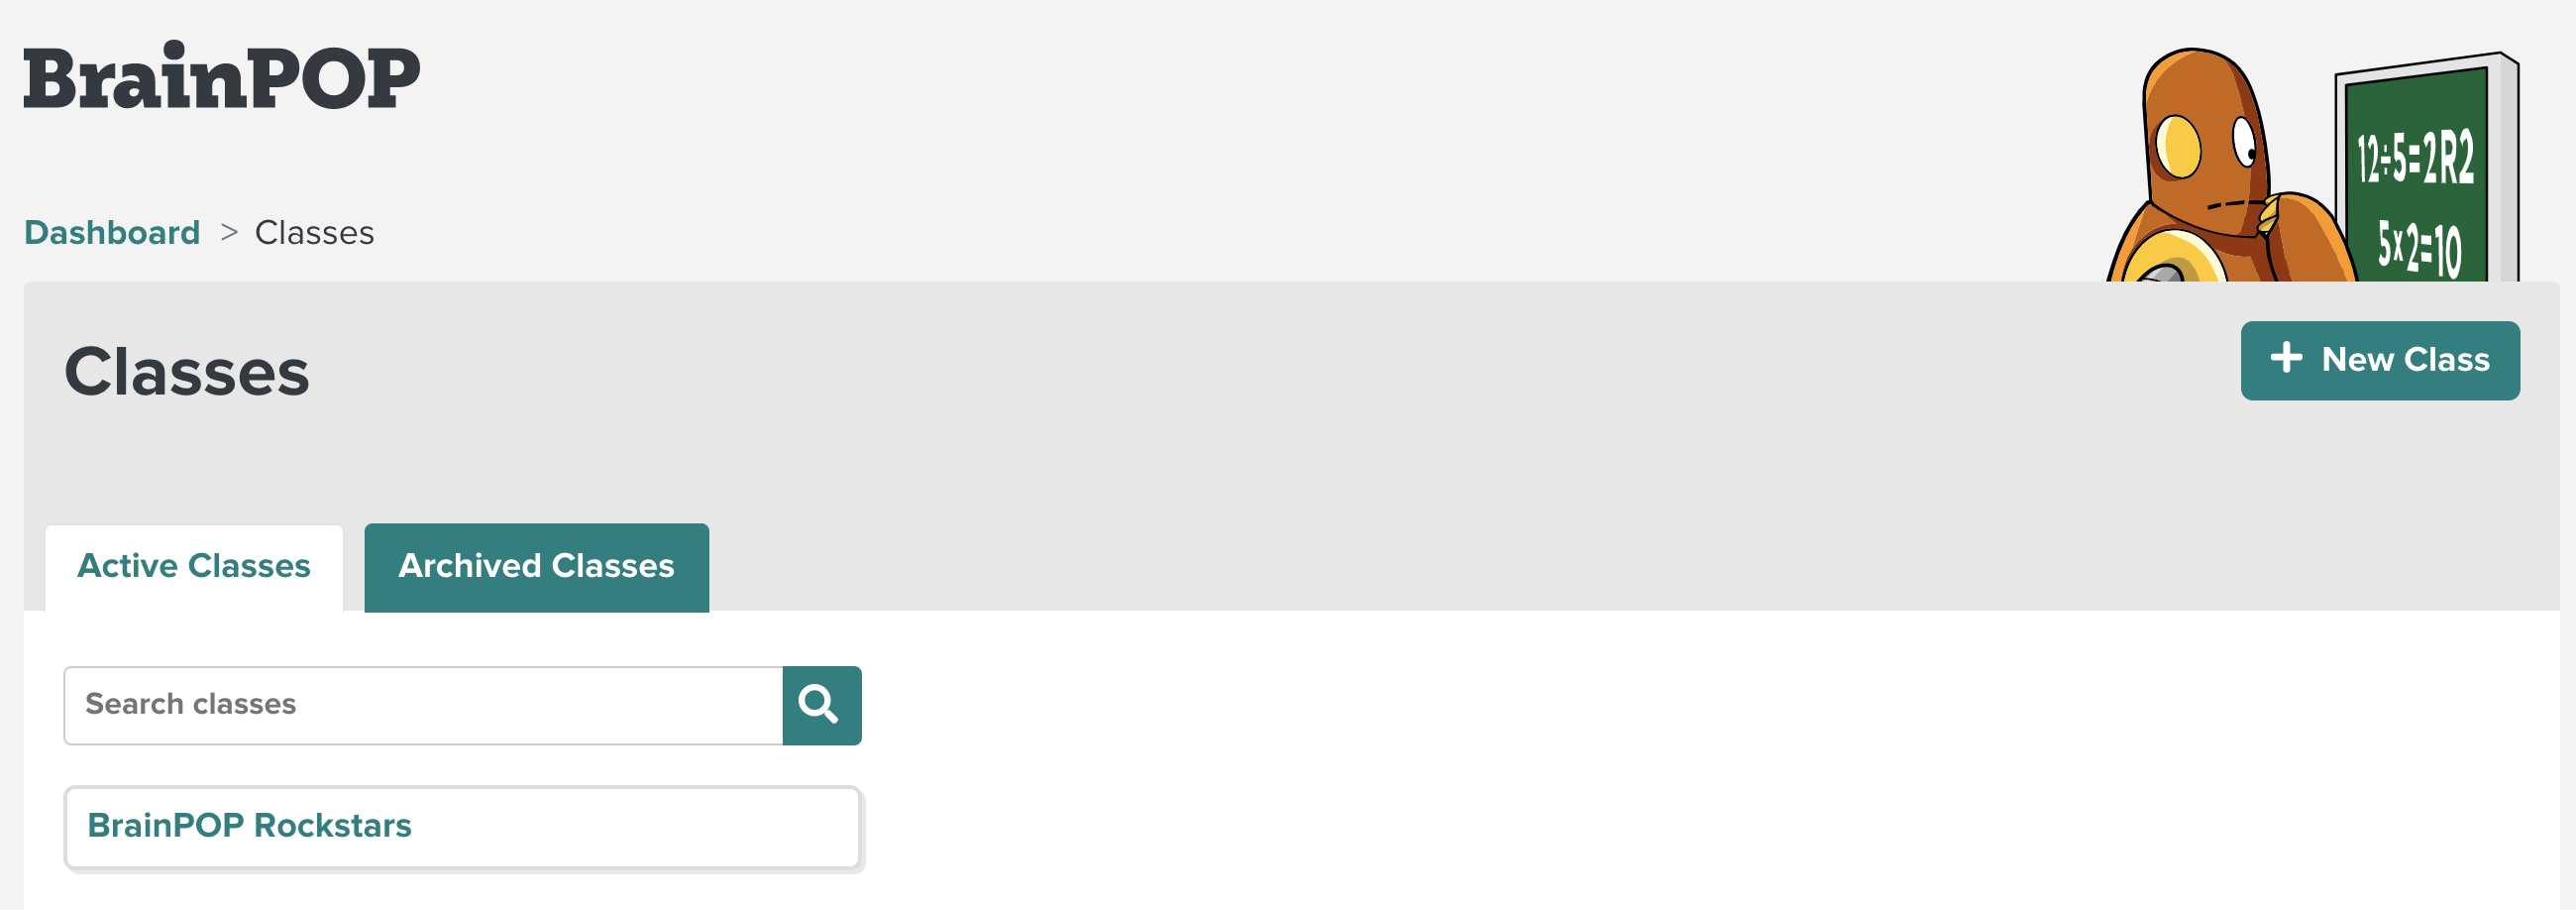
- To view all of your classes, click All classes.

- You'll see all of your active classes listed, as well as a separate tab to view any Archived Classes. Notice that you can return to the Dashboard at any time by clicking Dashboard.
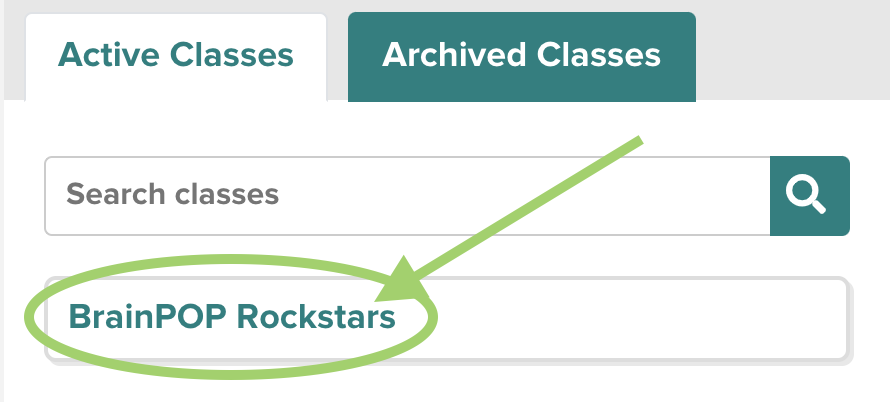
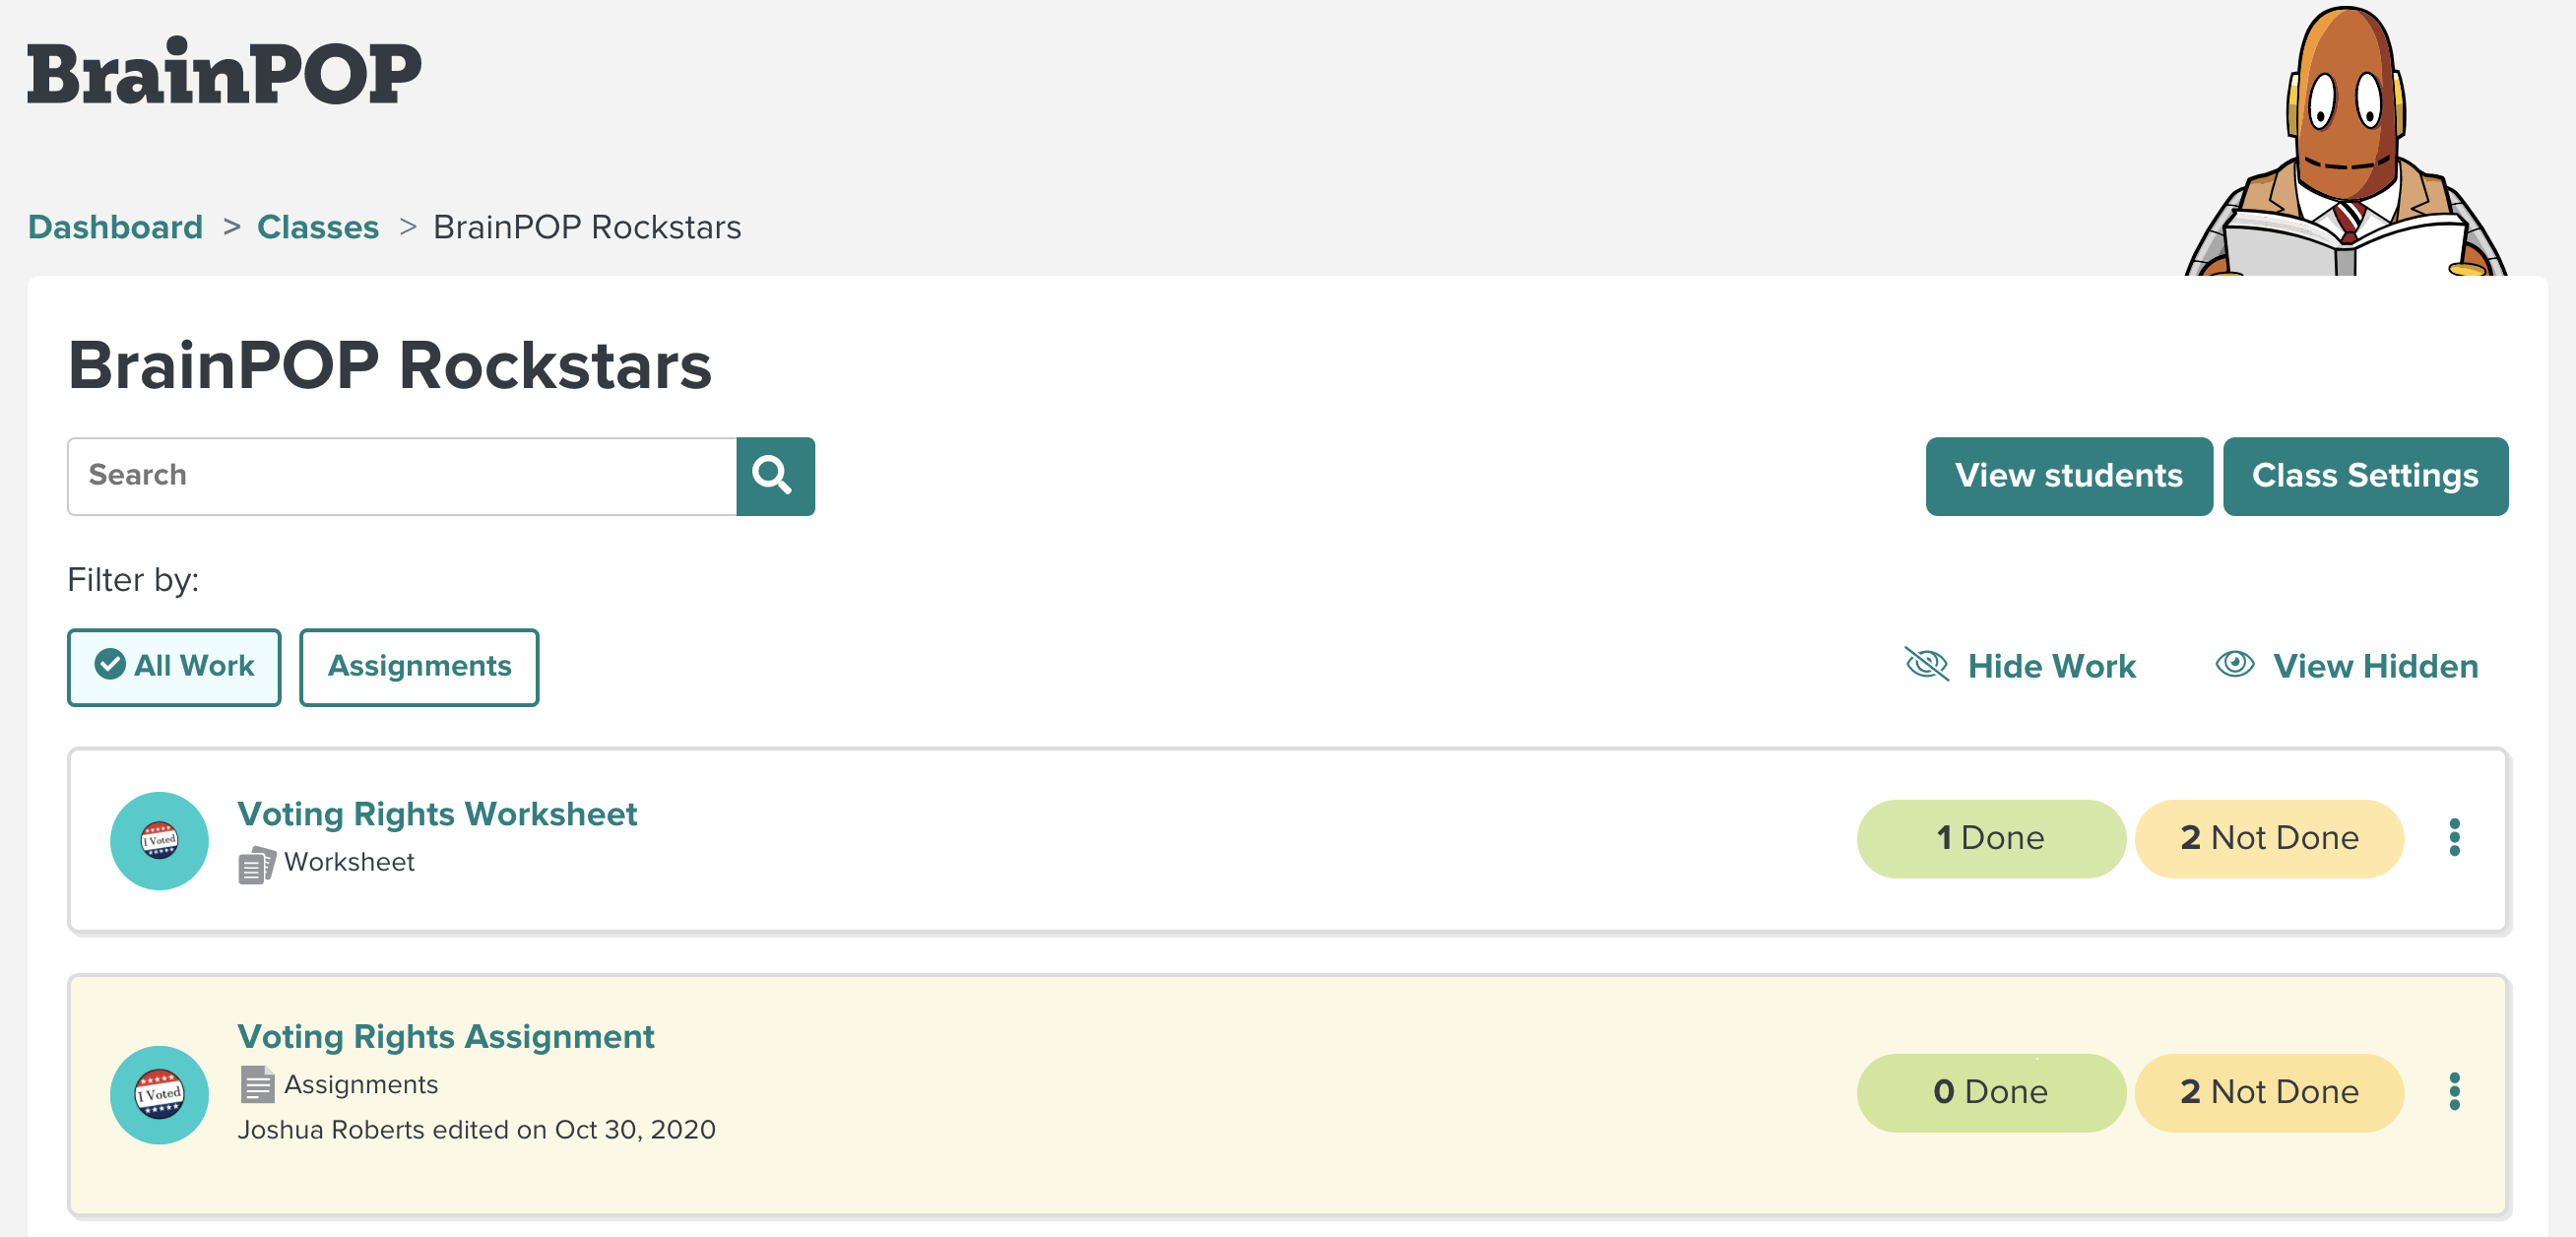
- To view class assignments and students, click on the name of the class.
- You'll see an overview of the class.
Changing the Name of a Class
If your class was set up manually or via Google Classroom import, you can change the name.
- While viewing the class, click on Class Settings.

- Click on pencil next to the class name.

- Enter the new class name. To confirm the new name, click Rename. Or to cancel, click Cancel.

Note: If your school uses Clever or Classlink/OneRoster to automatically roster classes, you cannot permanently change your class name. It will be over-written at the next automatic sync.
Changing the Grade Level of a Class
If your class was set up manually or via Google Classroom import, you can edit the grade level.
- While viewing the class, click on Class Settings.

- Below the class name, click the dropdown menu to view the grade level options.
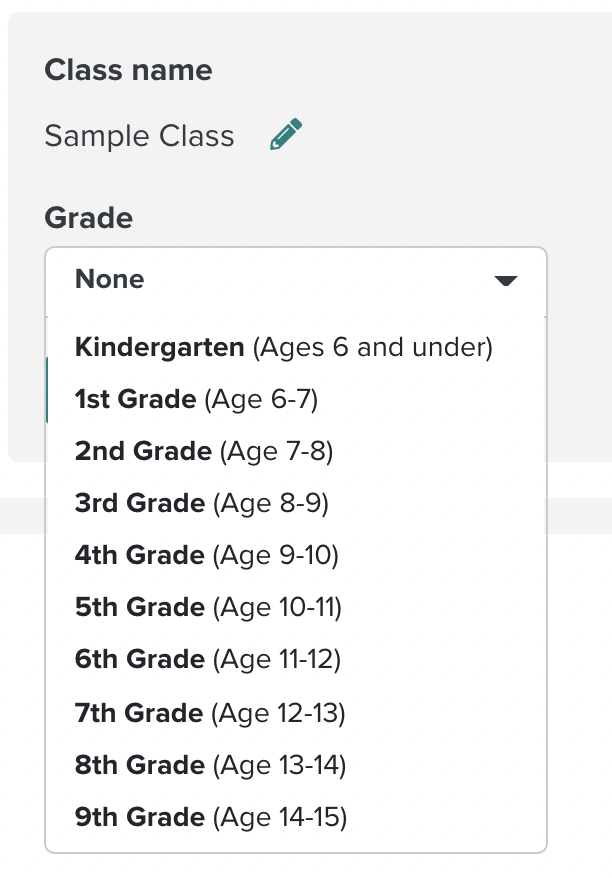
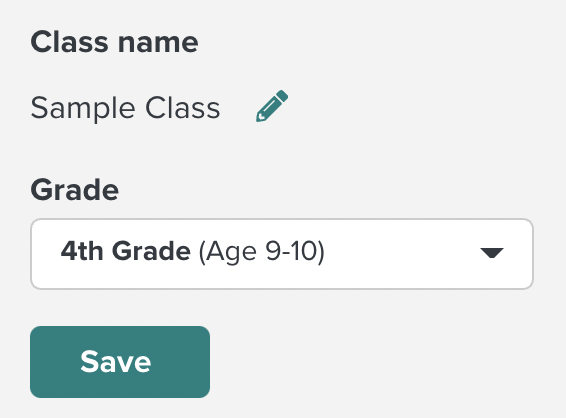
- Select a grade level, then click Save.
Viewing Students and Student Dashboards
Teachers can view their class rosters and also view student Dashboards they way they look to the student.
- To view students in a class, click View students.

- In the student list, you'll be able to see the students' names and usernames.
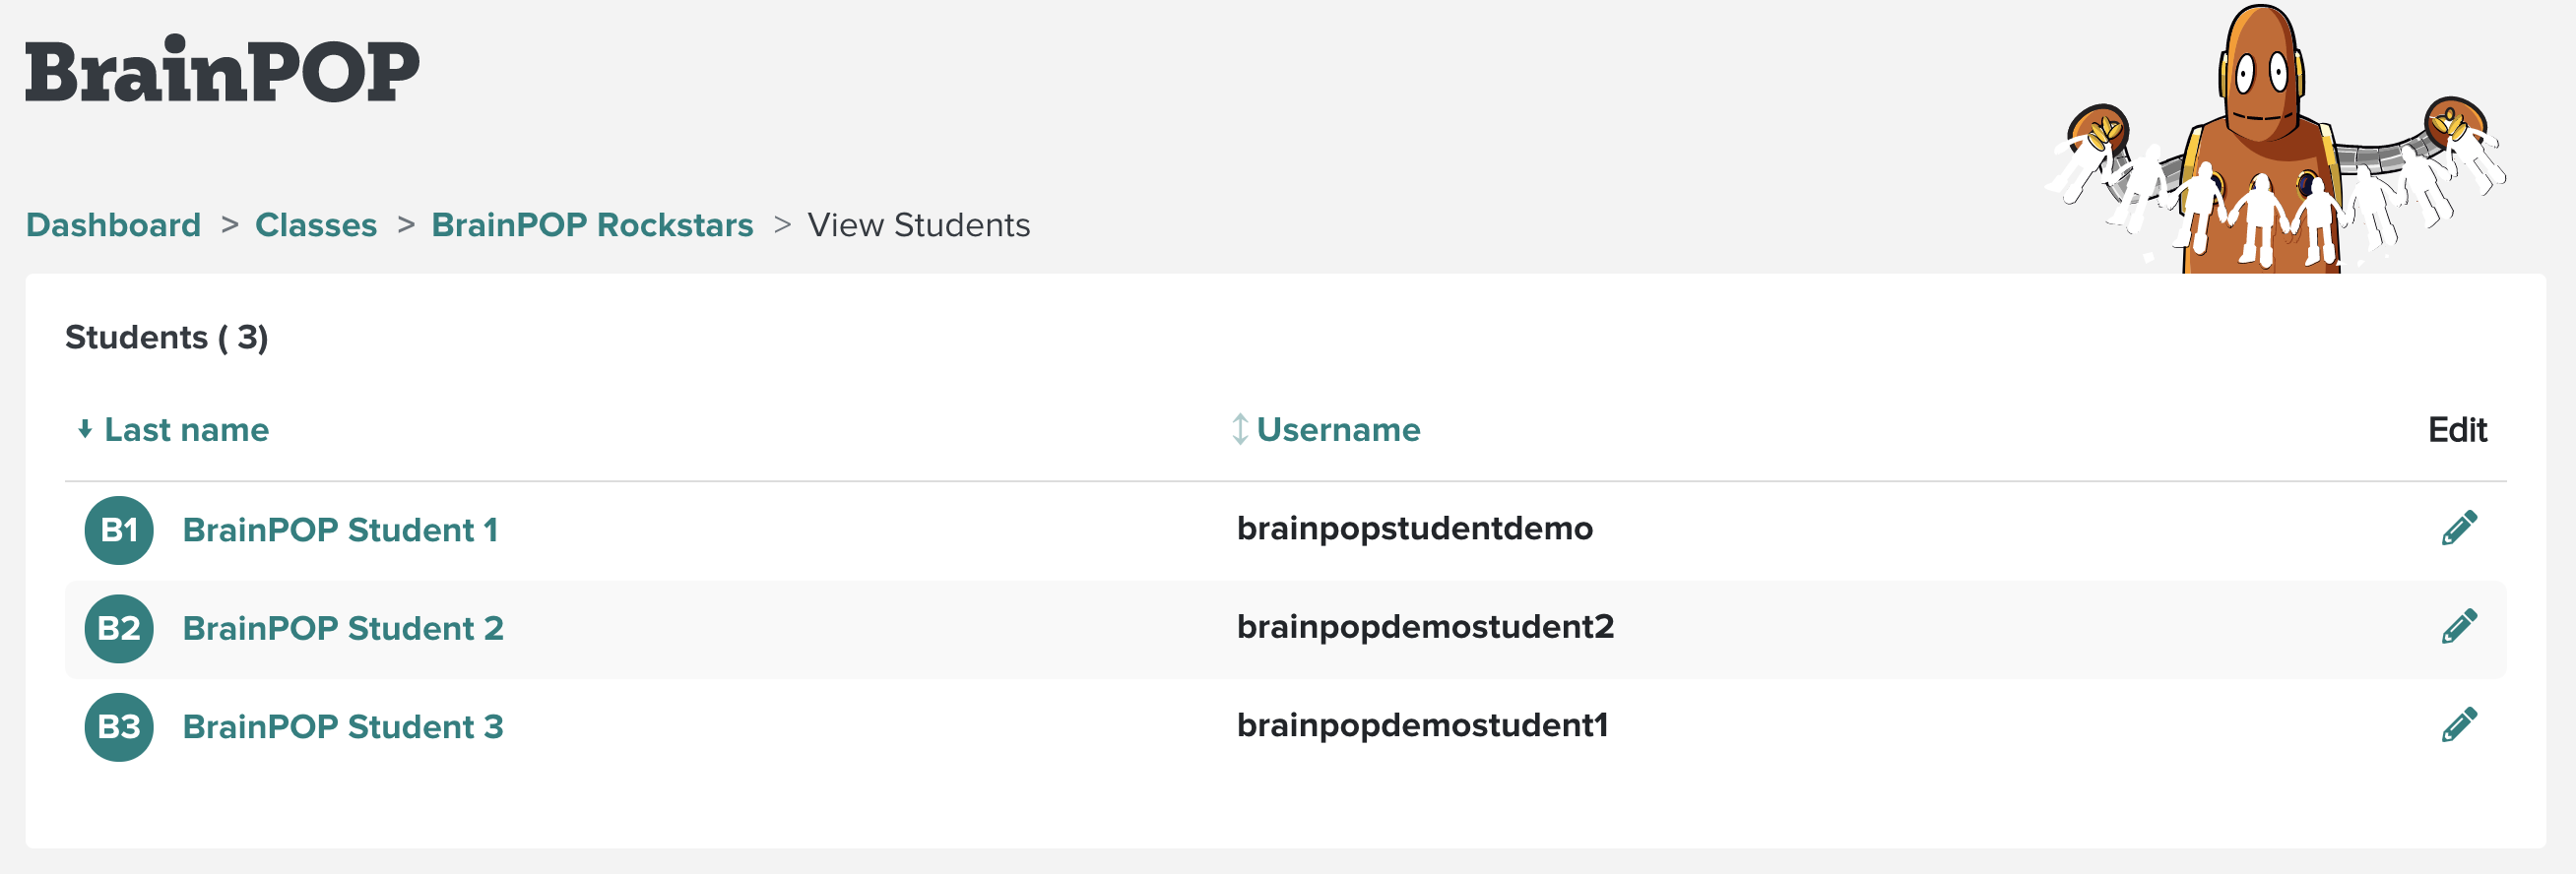
From here, teachers can view an individual student's dashboard.
- Click on the name of the student to see the student's Dashboard. You'll see "Hi, [Student's Name]" appear at the top, and a grey border will let you know that you are now seeing what the student sees.
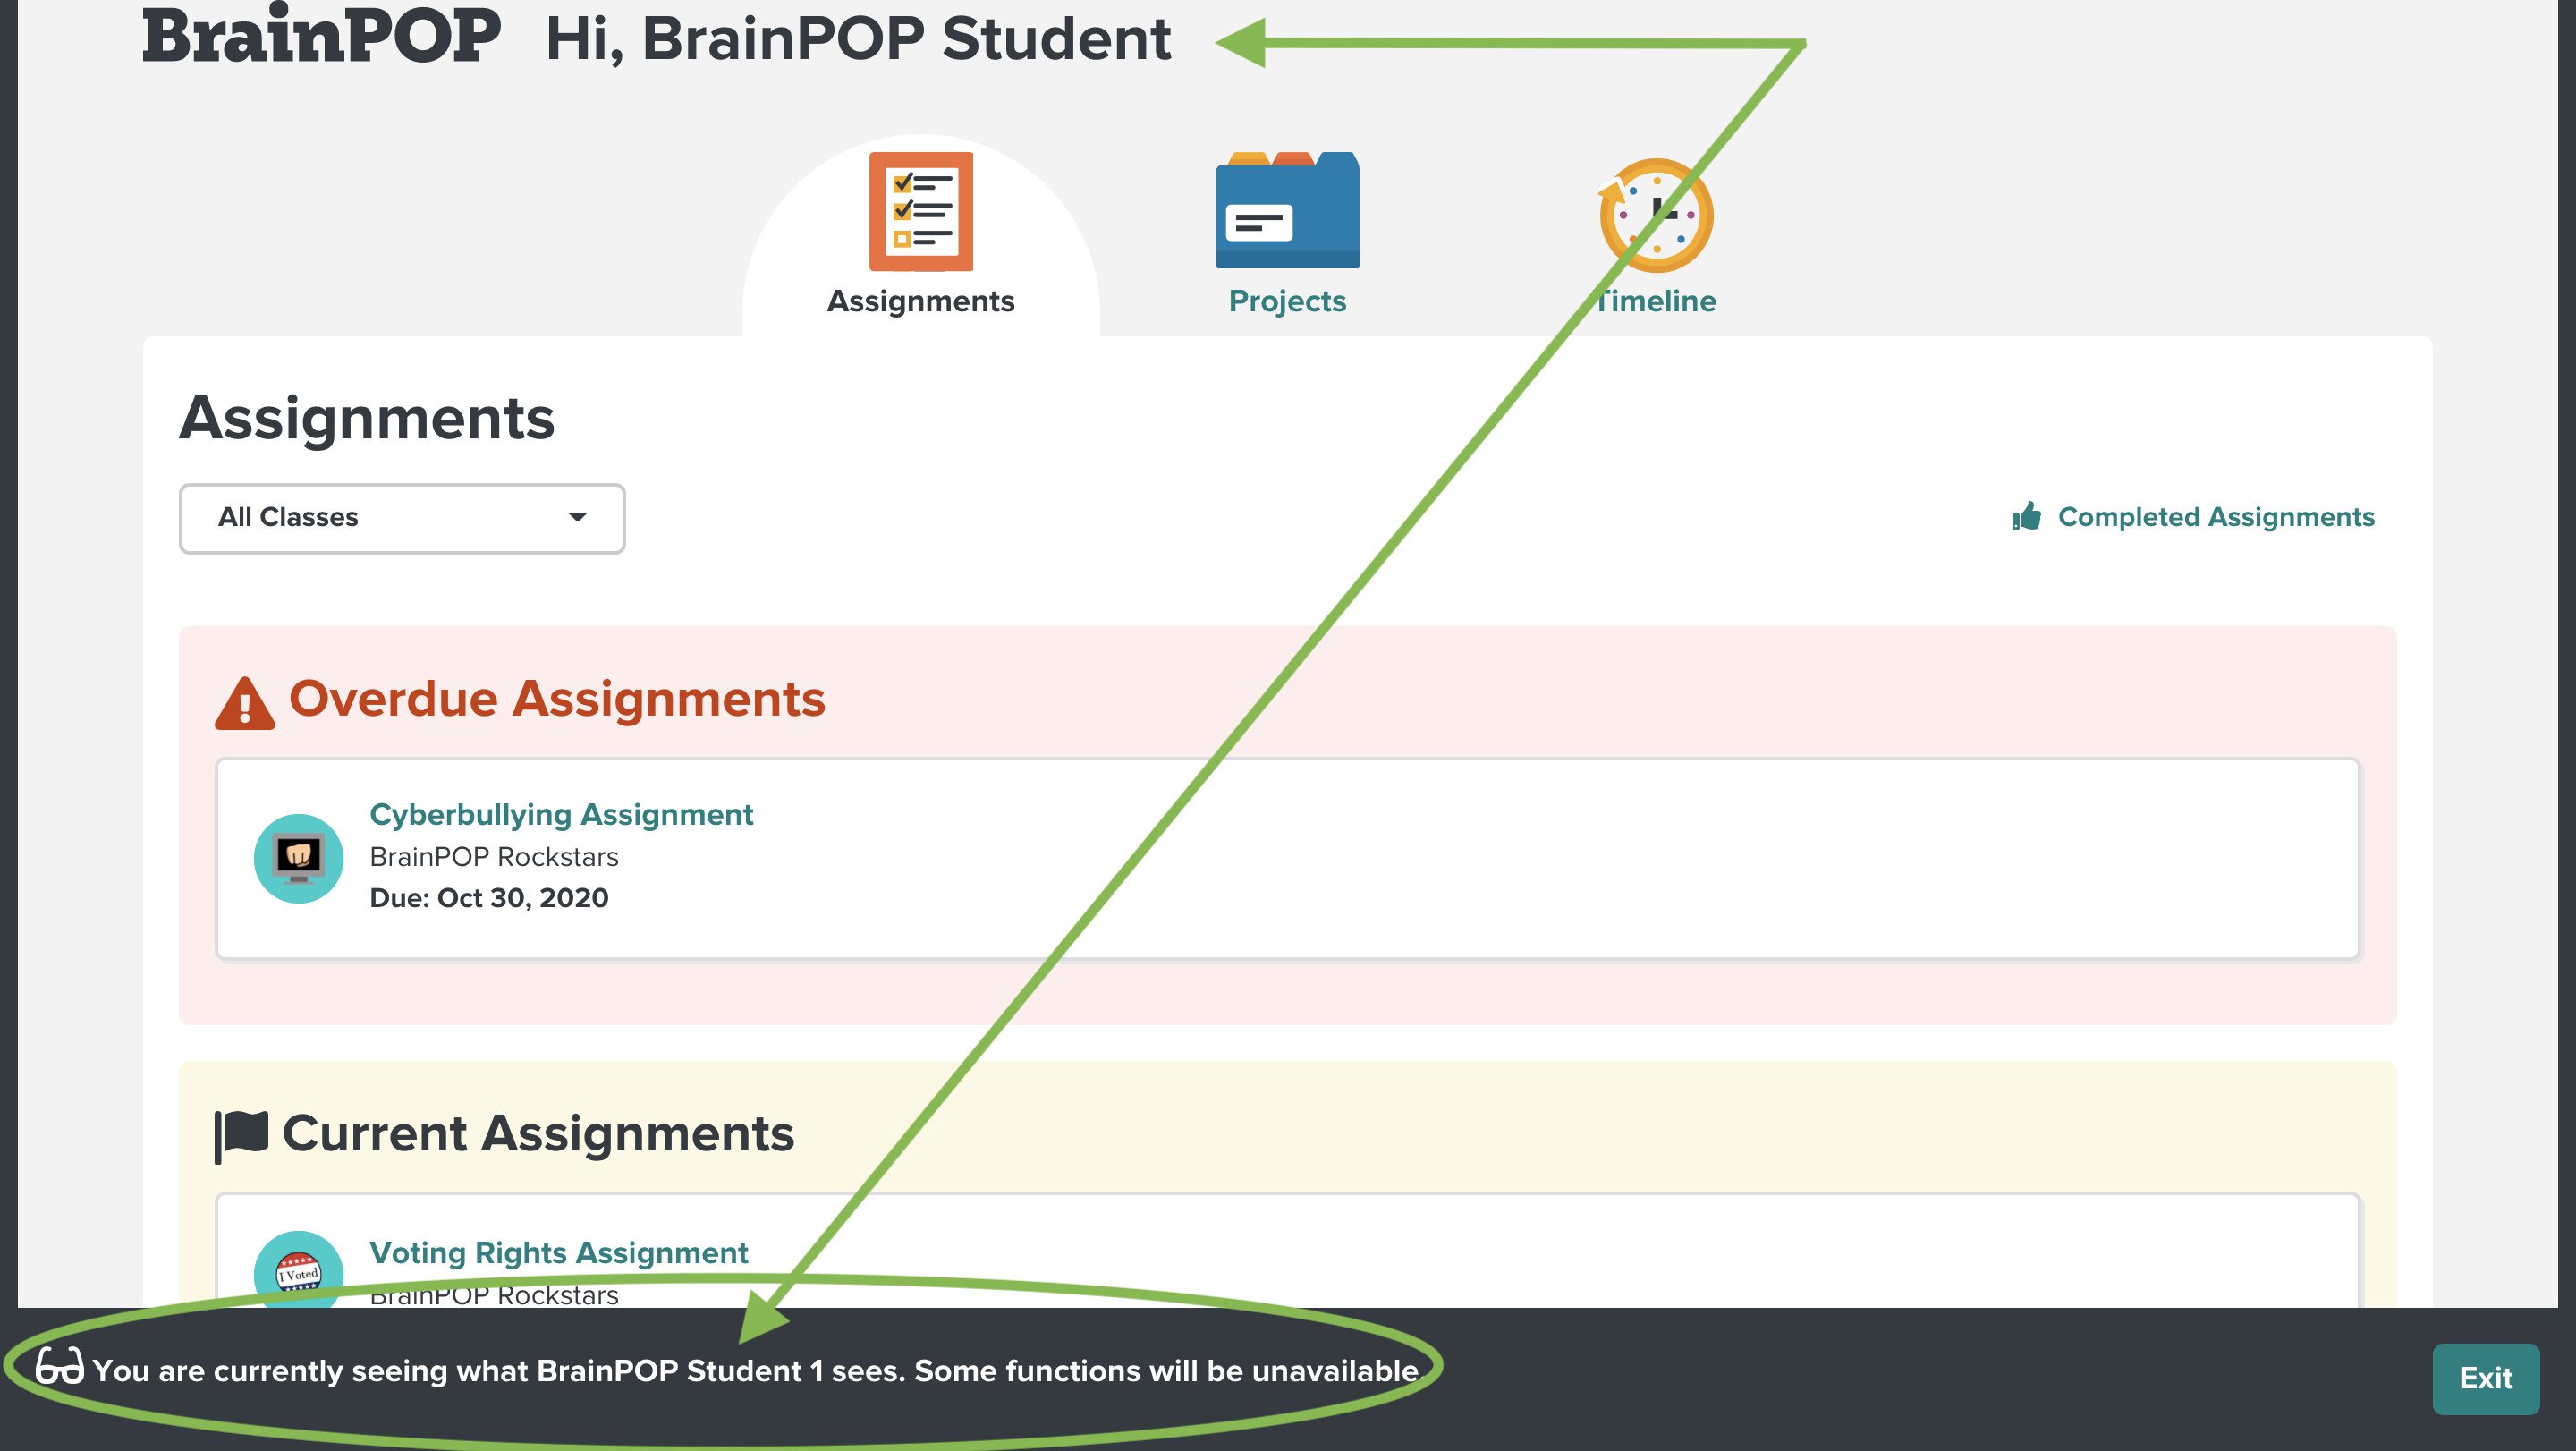
- You'll also notice that some functions are unavailable. For example, teachers cannot edit or complete work for students using this feature.
- The student Dashboard has three tabs: Assignments, Projects, and Timeline. To learn more about how students use each of these, check out these related student guides:
Managing Student Usernames and Passwords
If your school is creating accounts manually, you can help students manage their accounts by helping them changing their usernames, passwords, and first and last names.
NOTE: If your school is using Single Sign-On (SSO), such as Clever, Google, or Classlink, you will not be able to see or edit student usernames, as they are created by the SSO integration.
- While viewing the class, click on View Students.

- Click the pencil icon next to a student’s username to edit username and password.

- Make the changes needed and click Save.

- Make sure to let the student know about the changes you have made. Students will not be notified otherwise.
Adding Students to Classes
- Select the class from the Teacher Dashboard.
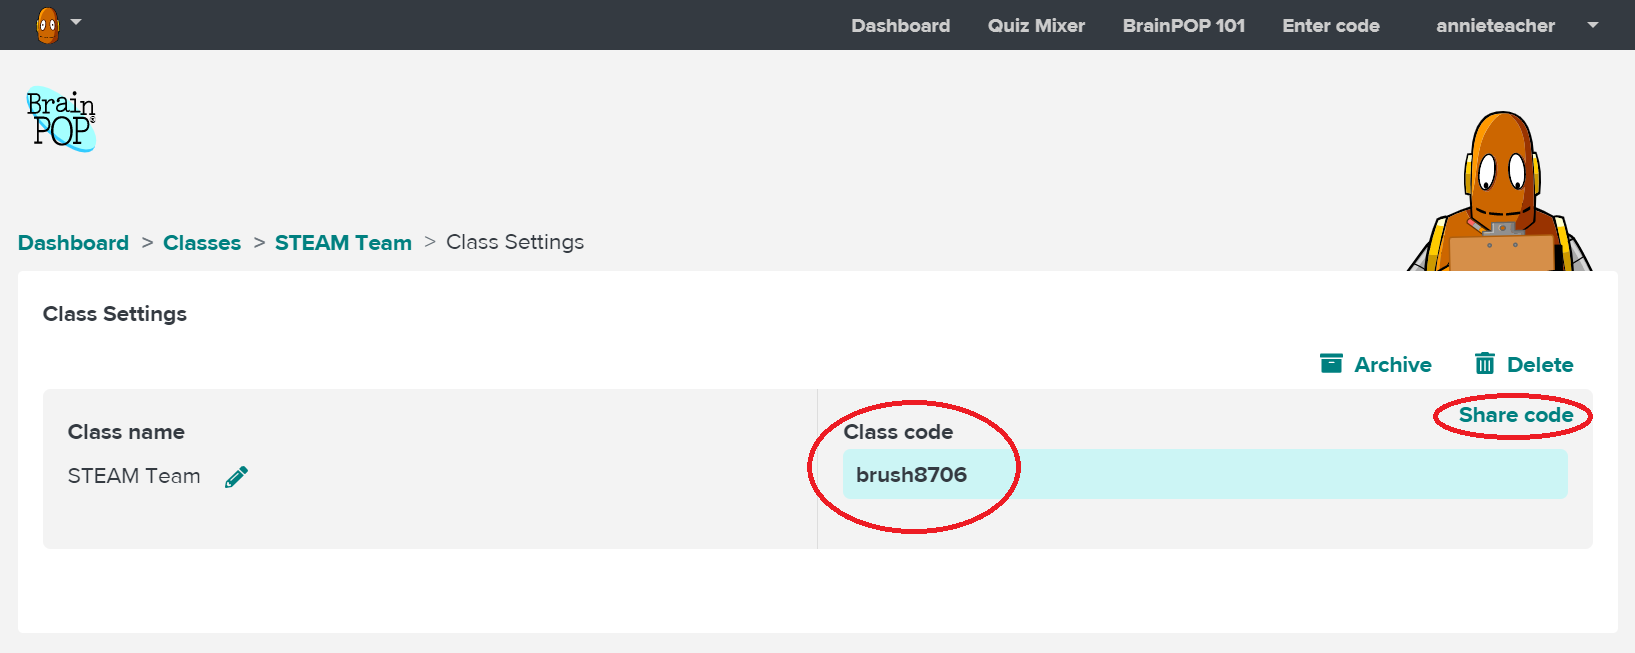
- Click the Class Settings tab and locate the class code on the right side of the screen.

- Share your class code with students and invite them to join. You can do this by informing your students of the class code listed under the Class Code or by clicking Share Code to download a pdf to share with your students.

- Students click Enter Code at the top of the screen.

- Students enter the class code and click Submit.

- For students creating individual student accounts for the first time, click Create Account and complete the form. Students who have individual student accounts enter their personal username and password and click Log In.

Teachers cannot add a student to their class from their Teacher Dashboard. Students must use the class code to create their account and/or join the class.
Updating Rostered Classes On Demand
Classes imported either on demand from Google Classroom or rostered automatically through Clever or Classlink/OneRoster have an option for teachers to re-sync classes on demand for updates.
This option can be found in the Teacher Dashboard after selecting a class and going to View Students. A class imported from Google Classroom, Clever, or Classlink/OneRoster will have an Update Class Roster button above the student list.
Google Classroom
The Update Class Roster option will appear in the View Students page of the class for any class a teacher has imported from Google Classroom.
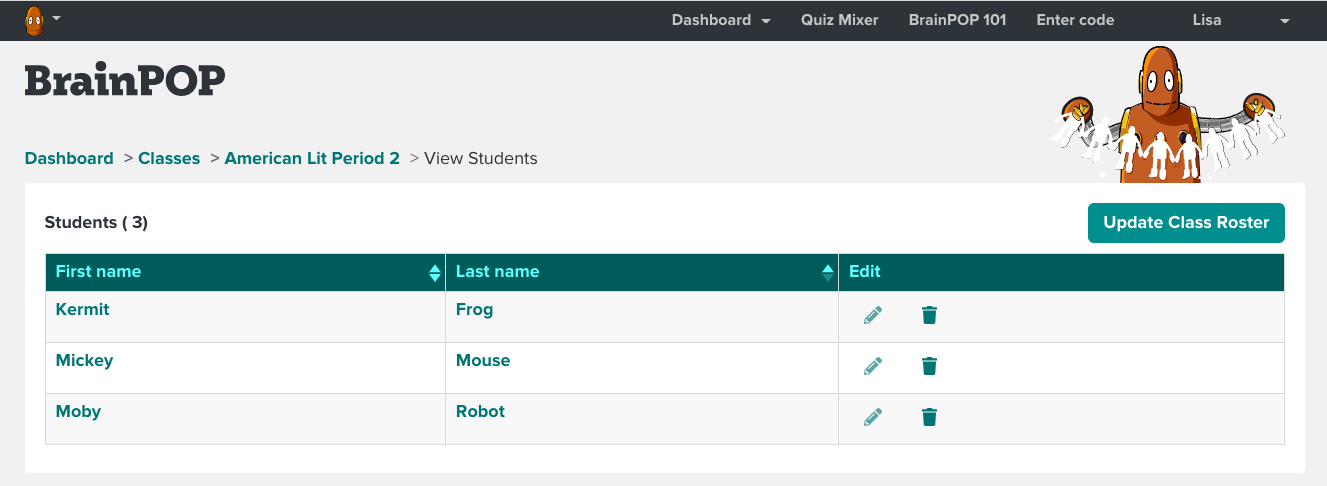
Selecting Update Class Roster for a Google Classroom class will bring you to the main Import Classes from Google Classroom page to select your classes for import.
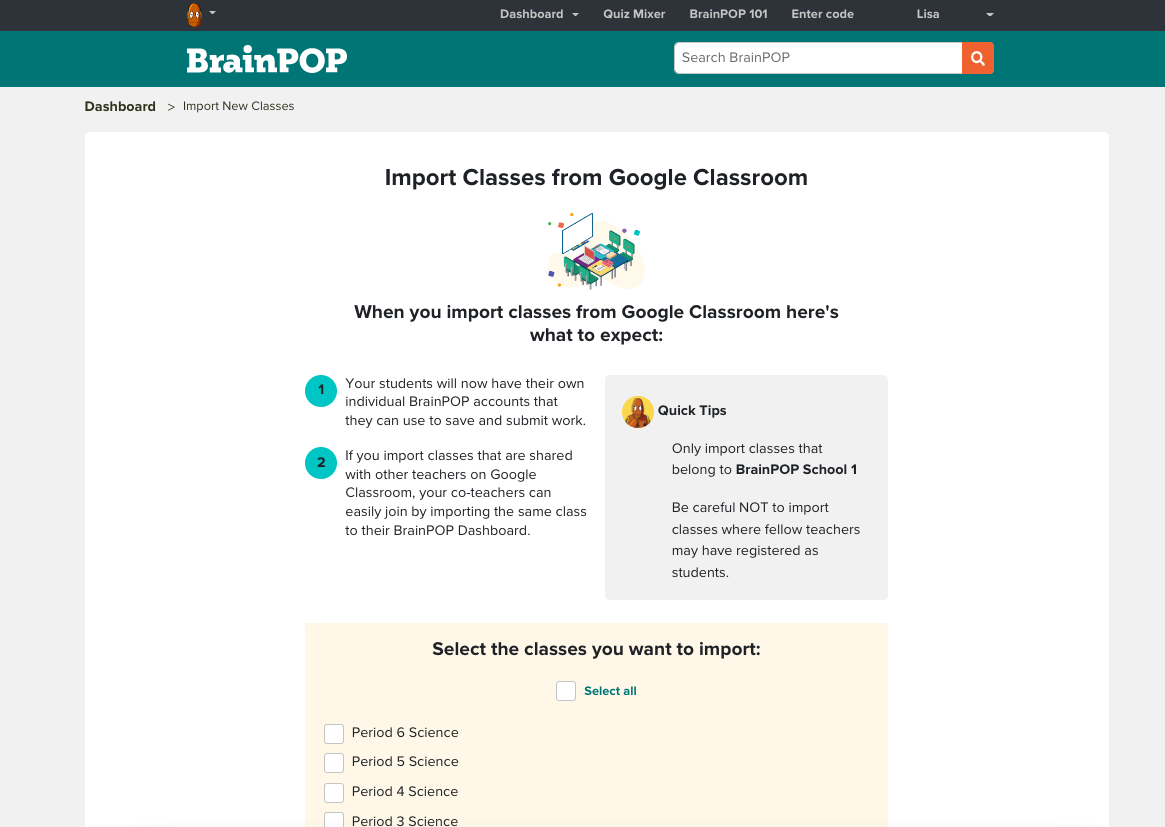
This is the same as the + Import New Classes option that will appear on the main Teacher Dashboard page.

Clever and Classlink/OneRoster
The option to Update Class Roster has the benefit of not requiring you to contact your admin to ask us to run a provision for any missing data, or needing to wait until the nightly sync for new students to be added to a Clever- or Classlink/OneRoster-managed class.
The option to Update Class Roster will appear in the View Students page of the class for any class rostered from Clever or Classlink/OneRoster.
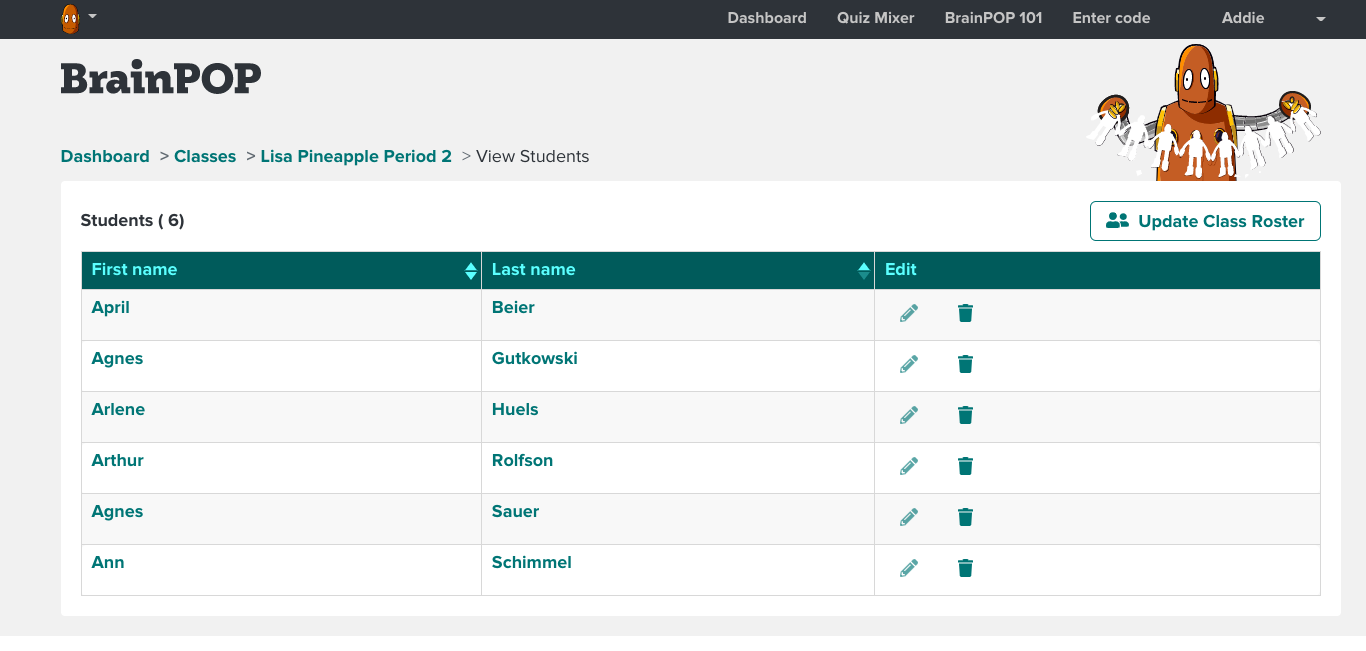
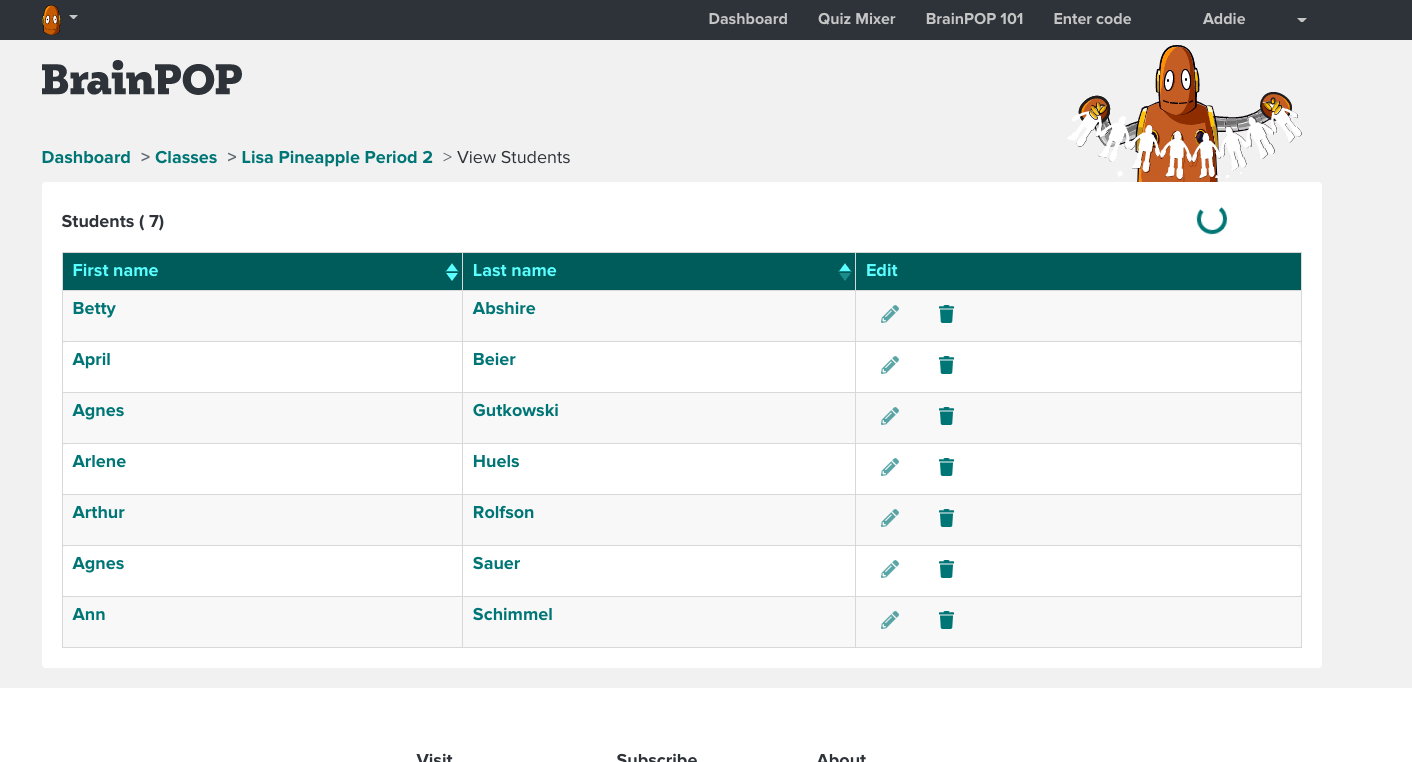
Clicking Update Class Roster will bring up a spinner, and then the class will update displaying any new students. In the example below, Betty Abshire was added and the student list updated automatically after using the Update Class Roster option.
Removing Students From Classes
- Select the class from the teacher Dashboard, then click View Students.
- Click the pencil icon next to the student’s name, then click Remove Student from Class to remove the student from the class.
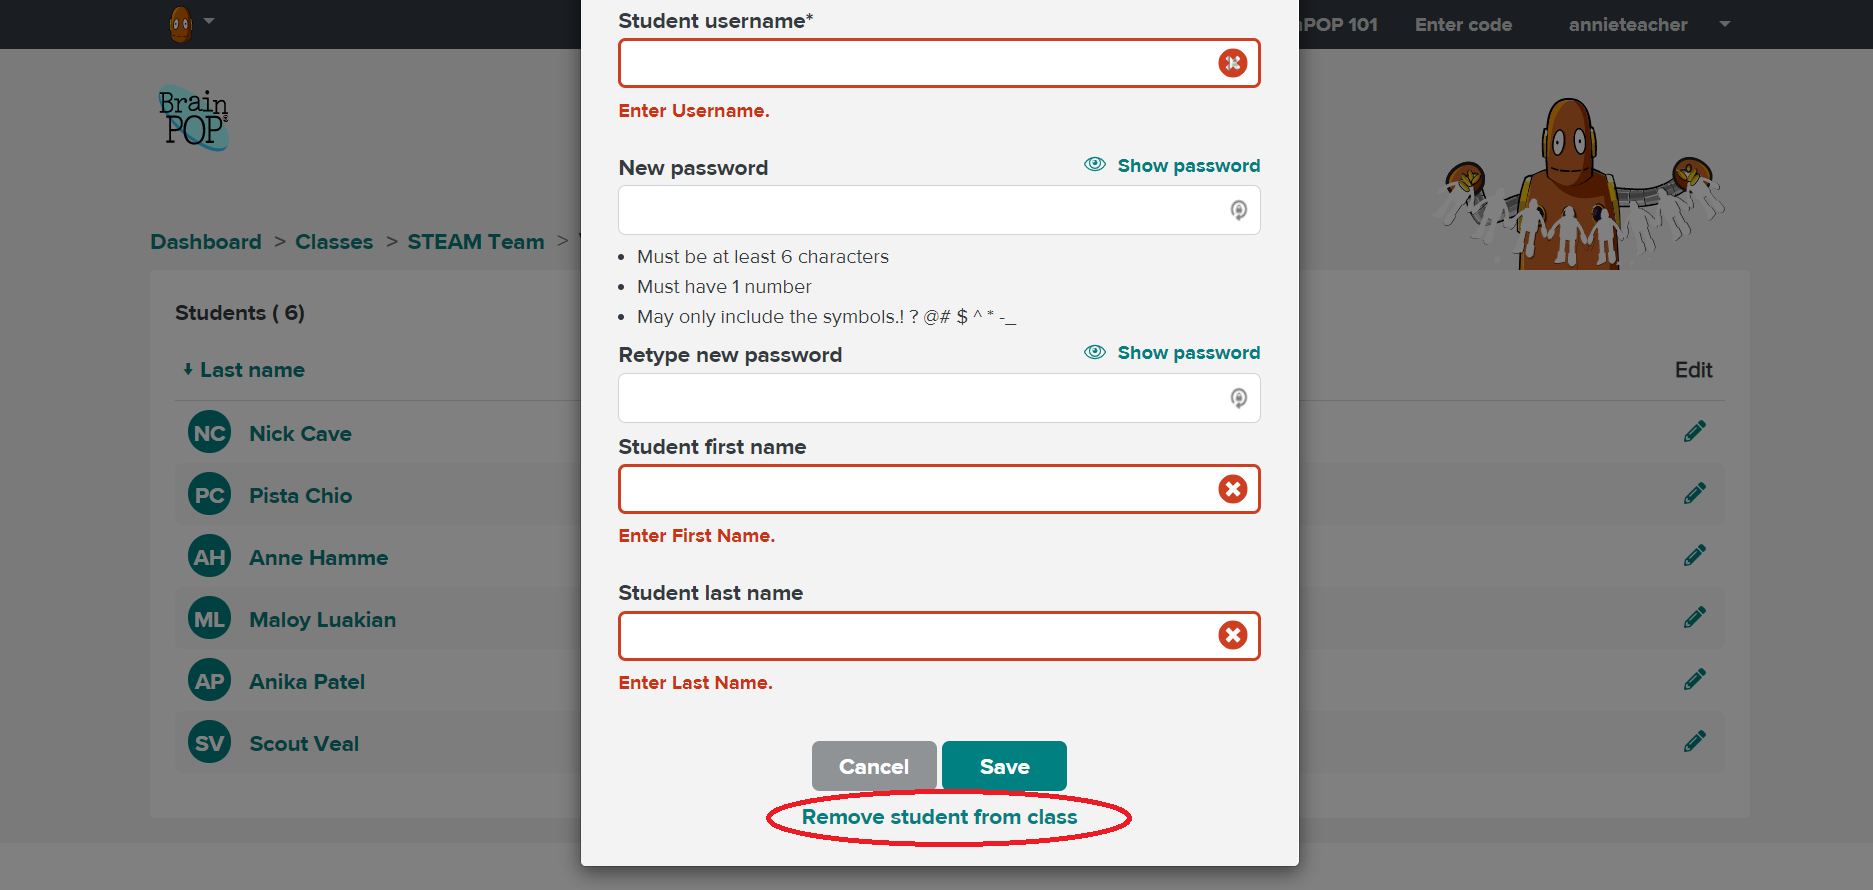
- When you click Remove Student from Class a final modal will pop up confirming you would like to remove the student from the class. Click Yes and the student will be removed from the class.


If the student you remove from your class does not belong to any other classes in your school, they will also lose access to the school plan. To regain access to BrainPOP, the student must join another class
Frequently Asked Questions
I don't see a Class Code on the class settings page. How do I update students in the class?

If you do not see a Class Code on your class settings page, your class has been automatically rostered by Clever or OneRoster API. These rosters sync every night, so you don't need to do anything to add students to your class but wait for the update to pass through.
Can I add a co-teacher to a class?
Yes! More info about co-teachers can be found here.
Still having trouble?
If you are still in need of assistance, fill out the ticket request form here and one of our agents will help you out as soon as they can!