For school or district setup, check out our quick-start guide here!
District administrators can create individual accounts for educators or upload educators in bulk via CSV using the District Admin Dashboard.
IN THIS ARTICLE
Adding Individual Educators
Adding Multiple Educators Via CSV Upload
Frequently Asked Questions
Adding Individual Educators
You can create individual educator accounts in the District Admin Dashboard using the following steps:
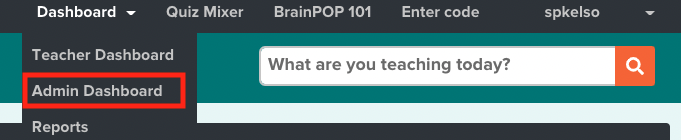
- Log in to your admin account and click Admin Dashboard.

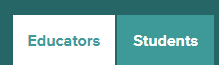
- From the Admin Dashboard, click Educators.
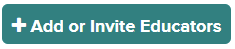
- Click + Add or Invite Educators.
- To upload an individual educator, click Add a new educator.

- Fill out the form with the educator’s username, first and last name, Educator ID and email address. You can then click the drop down menu to select the school the teacher should belong to. To add a teacher to multiple schools, click + Add another school.
- If this teacher should also have administrator privileges with access to the District Admin Dashboard, check the box that reads ‘Educator is an admin and can create and upload educator and student accounts and view usage data’.
- Click Create Account. After educator accounts are created, educators will get an email with a link to confirm their accounts and choose their passwords. (Be sure educators check their spam folders or add mybrainpop@brainpop.com to their trusted senders.) After confirming, they will be able to create their classes and have students join them.

Adding Multiple Educators via CSV Upload
When adding multiple accounts, we recommend uploading in bulk via CSV.
- Log in to your admin account and click Admin Dashboard.
- From the Admin Dashboard, click the Educators tab.
- Click + Add or Invite Educators.
- Click Add or update educators in bulk via CSV.

- You will then be asked to give each school within your district a School ID that is unique within the district if it's not set up. You will populate the School ID column in your CSV file to correspond with the school of each teacher you upload.
- Download the CSV template and step guide.
- Open the CSV template and prepare the CSV for the educators you wish to upload.
NOTE: Do not delete or rename any columns. Keep them exactly as they appear in the template.
All of the following columns are required for each educator account:
| First and last name | First and last name of the educator. |
| Username | This should be a unique username within all of BrainPOP, not just within your school or district. Usernames can contain letters, numbers, periods, dashes, underscores, and @. We suggest adding something unique like your school name or mascot to every username. For example, the username for Marcus Garcia might be mgarcia_scottsdale. |
| The educator’s email address, which must be unique within all of BrainPOP. | |
| Educator ID | A unique ID within your district. This can be any characters or numbers. We suggest using a persistent identifier you use year to year. If you use a Student Information System, this could be your teacher’s unique ID in that system. |
| School ID | The unique school ID you assigned to each school in your district. You will use this ID to assign teachers to their corresponding buildings in your district. |
NOTE: You should retain the CSV file format. If you’re using Google Sheets or Microsoft Excel, be sure to export as a .CSV file, and not an .XLS file.
- Upload the CSV by dragging and dropping in to the provided field or by clicking Browse and selecting the file.

- Click Next.
- If any data is missing, duplicated, or improperly formatted, then you will see a summary of errors.

- Choose Download CSV to Fix and open the CSV. You will see a new column added to your CSV with errors noted.

Here are some of the most common CSV errors and how to fix them:
| Error | How to Fix |
| Username is already taken within BrainPOP. | Choose a new username. Try adding your school name or mascot to the end of the existing username. |
| Username contains restricted characters. | Usernames can only contain letters, numbers, periods, dashes, underscores, pluses, and @. |
| Usernames cannot be changed for existing educators. | Use the educator's current correct username. |
| Required field is missing (educator_id). | All teachers must have a unique educator ID. |
| Educator ID belongs to another educator in your school or district. | Educator ID must be unique within your school or district. |
| School plan is expired. | You can only create accounts in schools with active subscriptions. |
| Unrecognized value (is_educator_admin). | If an educator is an admin, fill in "yes". Otherwise, leave blank. |
5. Fix the errors to prepare the CSV for re-upload.
NOTE: Don’t forget to delete the errors column before you re-upload your CSV.
6. Click Back to Upload to upload the CSV. Choose Next.
7. If accounts have no errors, click Woo hoo! Import Accounts to continue.
If you have errors in some of the accounts, you have two options:
Start Over With Extra Help: This will cancel the import and no accounts will be created or updated. You'll be able to download your original CSV with errors noted in a separate column. You can address the errors in this CSV and re-upload.
Import What We Can - Fix Others Later: This will continue importing only the valid accounts that have no errors. You'll be able to download a smaller CSV of just the invalid accounts with errors noted in a separate column. You can address the errors in this CSV and re-upload.
NOTE: Delete the errors column before you re-upload your CSV.

If you choose to Import What We Can - Fix Others Later, you will advance to a screen that allows you to download the accounts with errors and then import the accounts without errors to the dashboard.

- Click Download to get a CSV of your errors to fix later.
- Click Next: Import.
After importing, it may take a little bit of time to upload all the accounts. You may leave the page or close the window completely at any time, and the accounts will continue to upload. The progress of a CSV upload can be accessed by clicking CSV Log. An email confirmation will be sent when the upload is finished.
You can check the CSV Log to see the status of your upload (waiting, in progress, completed). Though rare, there may be additional errors in the publishing process, in which case the CSV log will provide an additional downloadable file.

Once uploaded, click See Accounts in Dashboard to view.
After educator accounts are created, educators will get an email with a link to confirm their accounts and choose their passwords. (Be sure educators check their spam folders or add *@brainpop.com to their trusted senders.) After confirming, they will be able to create their classes and have students join them.
For more information about setting up and joining classes, see our Create Classes article in our Help Center.
Frequently Asked Questions
How many CSVs can I upload simultaneously?
You can only import one CSV per account type (educator vs. student) at a time. If you import a second CSV of educators while the first is still being completed, the second will be queued and begin after the first CSV completes.
Can I add a teacher to multiple schools?
Yes you can! Here's what you need to do.
- From the Admin Dashboard, click Educators.
- Click + Add Educators.
- To upload an individual educator, click One Account.
- Click Does an educator already have an account?
This will allow you to send an email inviting the teacher to join the school, at which point they will have the option to switch and leave their original school, or add on the other school.
Can I stop the import once it’s started?
No. Uploads will continue until complete. You will be able to make changes to accounts once the upload is finished.